Sunday, May 20, 2012

Harvest Crisp

We felt the desire to have a bit of something sweet on Saturday. We looked into the fridge and found some strawberries and rhubarb. Then we recalled that there was a gallon of pears prepared to make a crisp in the freezer. We pulled it out, thawed it, and added half of them to the crisp. You could substitute any fruit, but I'd try and keep the rhubarb to retain some tartness.


Harvest Crisp
Fruit:
1 pint strawberries - sliced
4 stalks of rhubarg - sliced thin
3-5 pears (3 cups) peeled, cored, and sliced
1/4 Cup white sugar
1 Tbs cornstarch
1 Tbs flour

1. Combine all ingredients and spread out in an 8x8 dish. Allow to sit for 20-30 mins

Topping:
1 Cup quick oats
1/4 Cup white flour
1/4 Cup wheat flour
1/2 Cup brown sugar - not packed
1/2 Cup butter - slightly melted
1 tsp cinnamon
dash nutmeg

1. Mix until crumbly.
2. Using hands spread topping over fruit.
3. Bake at 350 for 40-45mins or until fruit is bubbly and topping is slightly browned.

Monday, April 16, 2012

Making Pizza

Little Sister has agreed to be interviewed about how she makes her delicious pizza dough.

Mrs Ham (MH): How did you learn how to make dough?

Little Sister (LS): From Culinary Arts at Foster Tech Center


MH: What is the Foster Tech Center?

LS: Its a program where you learn life skills. Its at Mt Blue High School.


MS: What is the key to making good dough?

LS: That's an excellent question. I don't know, I just make it.


MS: What would you like to tell people who are afraid of using yeast?

LS: There's no reason to be afraid of using it. As long as you don't put the yeast in too hot or too cold water, you'll be ok.


MH: What is the right temperture for yeast?

LS: 110-115deg, about the same as a baby bottle. Basically if you put it on your wrist and you can't feel it then it's perfect.
MS: Does anything you do to your dough set you apart from other dough makers?

LS: No.


MS: What is your favorite part about dough making? And why?

LS: Kneeding. I like to feel the dough coming together.


Pizza Dough (makes 2 large pizzas)

2 Cup warm water (110-115 deg)
4tsp yeast
2tsp sugar
2tsp salt
4 TBS oil
4 Cup flour

1. Heat water watching the temperature. Check temperature before adding yeast. Add yeast. Stir with a whisk. Allow to sit for five minutes while you are measuring everything out. 

2. Combine everything together minus the flour.

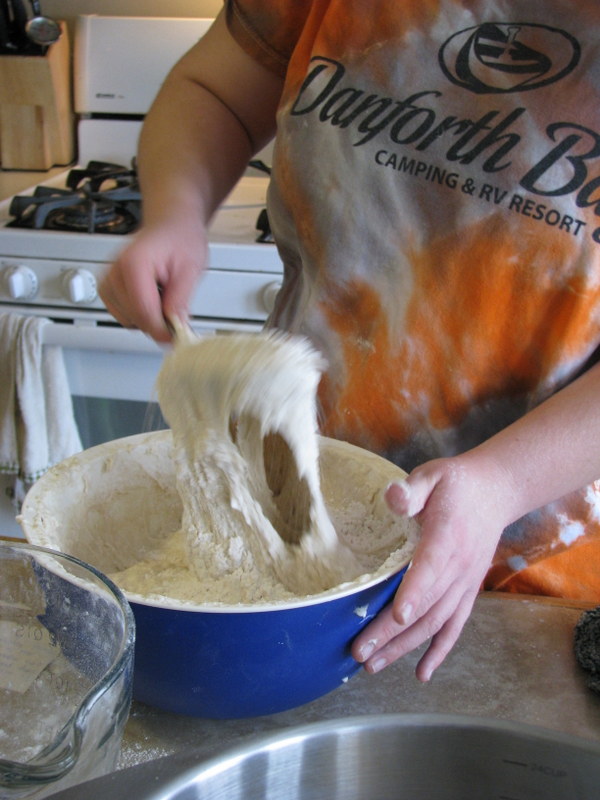
3. Add flour 1/2 Cup at a time until dough is no longer shiny and doesn't stick to the bowl or spoon. You may need more or less flour. 

4. Kneed dough. "The dough feels like liquid in your hands before you kneed it. When it's done it feels more like kids silly putty. I guess you could say kneed for three minutes." -Little Sister 

5. Transfer into greased bowl. Cover and let rise until doubled (couple of hours).

6. Divide and roll it out. After it's rolled out allow it to rest a couple of minutes before baking.

7. Bake pizzas at 425 for 15 minutes or until crust is brown.

Friday, April 13, 2012

Which One?

I have two recipe adventures to share, which would you like to hear about?

Green and Yellow Popcorn

OR

Bread Pudding

Cast your vote!


Sunday, March 25, 2012

Pumpkin Soup


Made the most yummiest soup ever today. The best part of this soup is that the main ingredients: pumpkin and maple syrup, came off the property here. It almost tastes like eating a pumpkin pie with out all the sugar and  heaviness. It is so simple to make. 

To find the recipe I googled: Pumpkin Soup which lead me to the Pioneer Woman's Website. Once there I found this recipe. I then went and looked for other recipe's to compare and contrast. I found others that used onions and celery or other spices, but the Pioneer Woman's just spoke to me.

I think that next time I will try curry instead of nutmeg and see how that tastes.


Look at all that good for you pumpkin!


Last years maple syrup is going in the soup and this years is in the pot in the back ground on the left.


Simmer, simmer, simmer. 

It was so smooth and yummy! When we froze the pumpkin we ran it through our food mill and so it was already smooth when we put it in the pot.

We will definitely be making this soup again!


Friday, March 16, 2012

Muffins: "Rabbit Food"

My Mom found these muffins in an Every Day with Rachel Ray magazine. She called them Zucchini-Carrot Mini Muffins, and you can find the recipe here. I'm not sure what the copy right is on a recipe so I'm not going to write it out for you on this blog, but you can check out the link for the recipe. A double batch yielded 2 dozen min muffins plus 3 regular sized muffins. I filled the tins almost to the top and they raised up nice and round. 

We used zucchini from our preservation efforts in the fall. It has been sitting in the freezer for sometime and gathered quite a bit of frost. I let it sit in a colander over a bowl to drain for most of the morning. Because of our preservation method, I had to use what was 4 cups of zucchini (pre-frozen) to achieve a whole cup. I made a double batch and used one medium sized carrot
Everyone really liked the flavor of the muffins. I asked my husband to identify what I had snuck in to the muffin and he jokingly said, "Carrot." and when I told him, "Yes" he responded, "Can't taste it." Then he shrugged and ate two more! 

I really love making muffins, especially mini muffins. There is something so comforting about popping a little bit of yummy goodness into your mouth along with a sip of hot coffee. You can feel like you are eating cookie, while sneaking in some vegetables. My toddler also likes the small muffins as they are perfect pre-breakfast snack as he waits for my first cup of coffee to kick in.

Make up your own batch and let me know how they taste!

For Rachel's Recipe click HERE

Thursday, March 15, 2012

Mini Meatloaf


The daycare was having Sloppy Joe for lunch and the way they eat it doesn't interest anyone under three feet tall here at the farm. We defrosted more meat than the kids could eat so I decided that meatloaf sounded tastier than joe's. We have a tried and true meat loaf recipe, but it is for 1.5lbs of meat and I only had about 1lb and I didn't feel like doing a lot of crazy math to adapt it properly. I opted to "wing it".

I pulled out the big blue mixing bowl and started throwing in everything I needed.

Yum!

Meatloaf is a great place to start for "winging it". I realize that some people aren't as adventurous as us, but as long as you remember a few things about cooking ground meat you'll do fine.
1. The key to good meatloaf is moisture. You don't want dry meat. A good way to keep the moisture in is to put it there. We use carrots and onions, I've been thinking of trying some shredded zucchini and my Dad swears by raisins. We also put a bit of ketchup into our loaf to keep it from drying out.
2. Allow loaf to rest. After you take it out of the oven leave it on the counter for 5 minutes before cutting into it (don't worry, it will still be hot!). Letting it rest allows the moisture to make it's way back into the loaf after cooking. 
3. Put in what you like. As far as ingredients you can put in anything. You can substitute oats for bread or bread crumbs and Jason's grandmother puts tortilla or fritos chips in her loaf, maybe you can think of something else to put in it too. Any spice you might use on beef can go in your loaf here are a few: cumin, oregano, red pepper, cilantro, garlic, and onion powder. Use salsa, tomato puree, or spaghetti sauce instead of ketchup. Let your taste buds decide.

Grab yourself a pound of meat and get creative!

Mini Meatloaf

Loaf Ingredients:
1 egg
1 small onion - (no less that 1/2 cup no more than 1 cup)
3Tbs ketchup
1Tbs brown sugar
2Tbs shredded/grated parmesan cheese
2/3 Cup oats
1tsp "secret" ingredient (chipotle rub)
1lb beef

Sauce (optional):
1/2 cup ketchup
1/4 b. sugar
1 Tbs yellow mustard

1. Preheat oven to 350
2. Mix all ingredients for loaf, except beef, together until mixed thoroughly
3. Add beef and mix together
4. Form into 5 mini loafs 
5. Bake 20mins
6. (optional) Smother with sauce and bake 15 mins more.
7. Allow loaf to rest for 5 mins before eating


Friday, March 9, 2012

Food for Thought

Here are just a few images of what you can expect from our kitchen in the future.
Muffins

Adventurous Foods

How We Preserve

Family Favorites

Our Learning Curve

Gifts

New Favorites

Celebrations

Thanks for popping by, please come again!